If you grew up sneaking an extra papad off the plate while the rest of dinner was still being served, this one is for you. This crispy urad dal papad is my go-to papad recipe indian style: simple ingredients, the right texture, and that clean, peppery bite that tastes like proper home cooking. We make a sturdy, well-kneaded urad dough, roll it thin, dry it until it goes bone-dry, and then cook it fast (roast, fry, or air fry). I also included my favorite quick topping so you can turn it into easy masala papad when you want something snacky that still feels like a real treat.
Crispy Urad Dal Papad: Authentic Homemade Indian Recipe (and the Secret to That Perfect Snap)
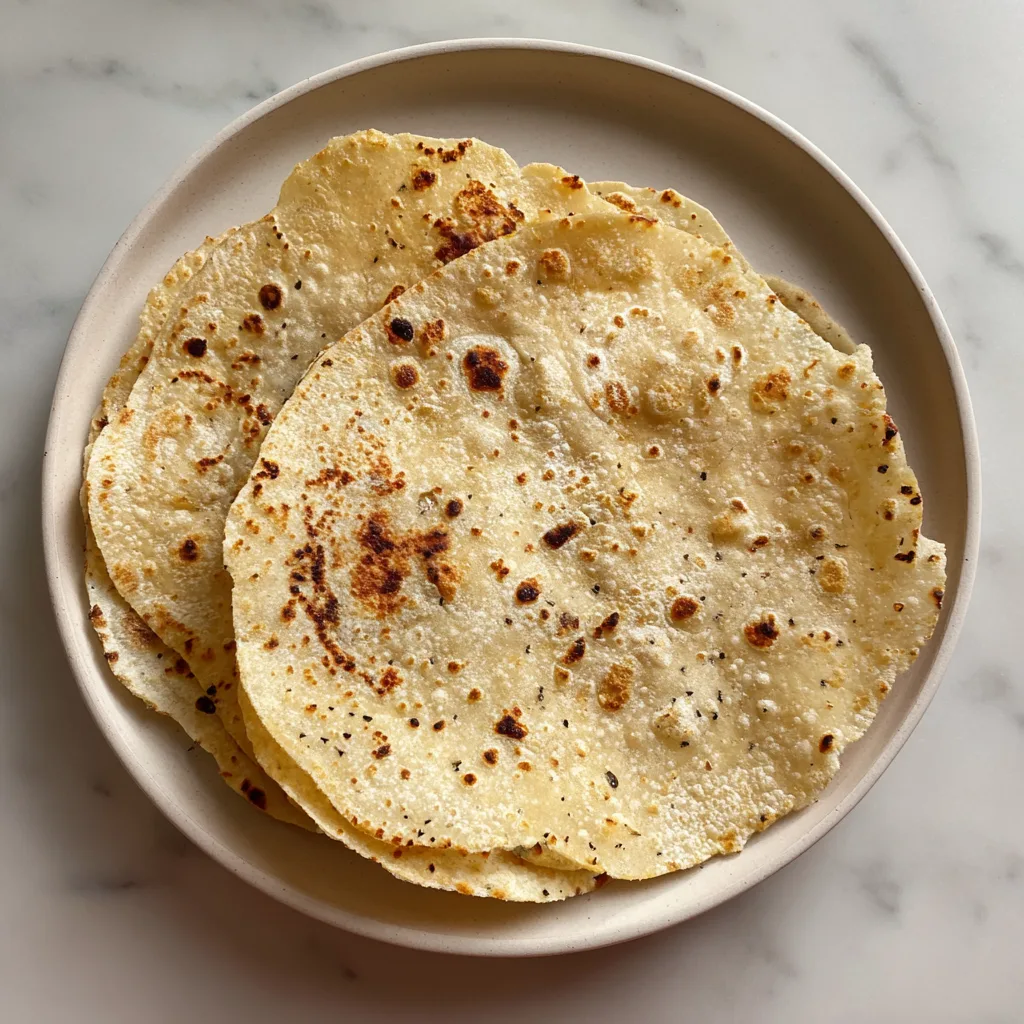
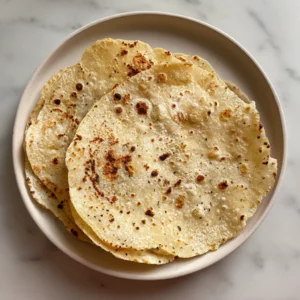
Homemade urad dal papad with classic spice, rolled thin, dried, and cooked until shatter-crisp.
Prep Time 45 minutes mins
Cook Time 10 minutes mins
Total Time 55 minutes mins
Course Snack
Cuisine Indian
Large Mixing Bowl use a wide bowl so you can knead comfortably; a stand mixer with a dough hook works if you want less arm work, but hand-kneading gives you better feel for hydration
spice grinder or high-speed blender only needed if you are grinding whole urad dal into flour; you can use store-bought urad dal flour to skip this
Fine-mesh sieve helps you sift homemade flour for a smoother papad; optional but strongly recommended for even rolling
Rolling Pin a small chakla-belan style rolling pin is ideal, but any rolling pin works; a tortilla press can help with quick shaping, though you may still need to roll thinner by hand
flat rolling surface a wooden board, marble slab, or a clean countertop; if the surface sticks, use a sheet of parchment or a light dusting of flour
baking sheet or large tray for drying; line with a clean cotton cloth or parchment; a mesh rack speeds drying and reduces sticking
clean kitchen towel or muslin cloth cover rolled papad while you work so edges do not dry and crack before you finish rolling the batch
tawa or cast-iron skillet best for roasting papad with an even char; alternative: open flame with tongs for extra blistering, or an air fryer for hands-off crisping
Tongs for flipping papad quickly; if cooking over a flame, use long tongs and keep the papad moving to avoid burning
Cooling rack optional but helpful so roasted papad stays crisp instead of steaming on a plate
For the urad papad dough
- 2 cup urad dal flour preferably made from skinned urad dal (white urad); if grinding at home, sift after grinding for a finer texture
- 1 1/2 teaspoon fine salt adjust if you plan to top the papad heavily later
- 1 teaspoon whole black pepper crush coarse for classic speckled heat; substitute with 3/4 teaspoon ground black pepper for convenience
- 1 teaspoon cumin seed lightly crushed; adds warm, savory depth
- 1/2 teaspoon ajwain optional but great for aroma and digestibility; substitute with a pinch of carom seed if you like it bold
- 1/4 teaspoon asafoetida optional; use a gluten-free asafoetida blend if needed
- 1 teaspoon baking soda optional but helpful for extra blistering and a lighter snap; do not overdo it or flavor turns soapy
- 2 teaspoon neutral oil such as sunflower or avocado; helps tenderness and rolling; ghee works but can slightly slow drying
- 3/4 cup warm water add gradually; you may need a little less or a little more depending on flour fineness and humidity
For rolling and drying
- 2 tablespoon urad dal flour for dusting; you can also use rice flour for a less sticky, smoother roll
- 1 teaspoon neutral oil for lightly greasing your hands or the rolling surface if needed (use sparingly so papad dries properly)
Optional topping for easy masala papad
- 1/2 cup red onion finely chopped; soak in cold water 5 minutes for a milder bite, then drain well
- 1/2 cup tomato seeded and finely chopped so the papad stays crisp longer
- 2 tablespoon cilantro finely chopped; substitute with mint for a different vibe
- 1 teaspoon lemon juice add right before serving
- 1/2 teaspoon chaat masala optional; adds tang and funk; substitute with a pinch of amchur plus a pinch of kala namak
- 1/4 teaspoon kashmiri chili powder optional for color and gentle heat
Make the dough (the part most people rush)
In a large mixing bowl, combine urad dal flour, salt, crushed black pepper, crushed cumin seed, ajwain (if using), asafoetida (if using), and baking soda (if using). Whisk well so the spices disperse evenly; uneven mixing is how you end up with one papad that tastes perfect and another that tastes like a pepper bomb.
Drizzle in 2 teaspoons oil and rub it into the flour with your fingertips until the mixture looks evenly moistened and slightly clumpy.
Add warm water a little at a time, mixing with your hand until a stiff dough forms. You are aiming for firm and smooth, not sticky. If it feels crumbly and refuses to come together, add water 1 teaspoon at a time. If it feels sticky, dust with a little more urad flour.
Knead for 8 minutes, pressing and folding until the dough looks smooth and feels elastic. This knead is what gives you papad that rolls thin without tearing. Cover the dough with a damp towel and rest for 10 minutes so the flour hydrates fully.
Roll thin, keep them even, and do not let edges dry out
Divide the dough into 20 equal portions (about the size of a large marble). Roll each into a smooth ball. Keep the balls covered with a towel while you work.
Lightly dust your rolling surface with urad flour. Place one dough ball down and flatten it with your fingers into a small disk. Roll into a very thin round, about 5 to 6 inches wide. Aim for an even thickness; thick centers stay leathery after cooking.
If the papad keeps springing back, let the dough disk rest on the board for 1 minute, then roll again. If it cracks at the edges, the dough is a touch dry: wet your fingers with a few drops of water, rub over the dough ball before rolling the next one, and keep the remaining dough covered.
Transfer the rolled papad to a tray lined with cloth or parchment. Do not stack raw papad directly on top of each other unless you separate them with cloth or parchment, or they can stick and tear.
Dry until bone-dry (this is the real secret)
Dry the papad in a sunny, breezy spot until completely dry and rigid. Flip each papad once or twice during drying so both sides dry evenly. In humid weather, use a dehydrator at 125F or place near a fan indoors. Papad must feel hard and look matte, not cool or flexible, before storing.
Store fully dried papad in an airtight container with a paper towel at the bottom to absorb any stray moisture. Keep at room temperature in a dry cupboard.
Cook the papad (choose your method)
Roast on tawa (most classic): Heat a dry tawa or cast-iron skillet over medium-high heat. Place one dried papad on the hot surface. After 10 seconds, it will start to blister. Flip with tongs and roast the second side. Press gently with a folded cloth or a flat spatula to encourage even blistering. Total time is about 45 seconds per papad. Move to a cooling rack so it stays crisp.
Open flame (most dramatic blistering): Hold the papad with tongs directly over a medium flame, moving constantly. Flip as soon as it blisters. This takes about 20 to 30 seconds total. Watch closely: it goes from perfect to burnt fast.
Air fryer (hands-off): Preheat air fryer to 370F. Lightly brush papad with a tiny bit of oil (optional). Air fry 1 papad at a time for 2 minutes. Let it sit 30 seconds to crisp fully.
Deep fry (extra crunchy, more indulgent): Heat 1 inch of neutral oil to 350F. Slide in a papad and gently press it under the oil with a spider or slotted spoon so it puffs evenly. Fry 10 seconds, flip, then fry 10 seconds more. Drain well.
Turn it into easy masala papad (optional but highly encouraged)
For a quick masala papad, top freshly roasted papad with chopped onion, chopped tomato, cilantro, lemon juice, chaat masala, and kashmiri chili powder. Serve immediately. The topping is juicy by design, so the longer it sits, the softer the papad gets.
If you are making this papad recipe indian style for a full meal, treat papad like the crunchy counterpoint: something crisp, salty, and spicy that wakes up softer foods.
Papad photographs best right after roasting, when the blisters look dramatic and the edges still cast sharp shadows. If you are shooting masala papad photography, keep the topping finely chopped, well-drained, and piled in the center so the crisp edge remains visible and crunchy.
For the most classic texture, use skinned urad (white urad). If you are grinding at home, split, skinned urad dal grinds smoothly and gives you a cleaner snap. Whole urad with skin can work but tastes more earthy and can look speckled. Sifting the flour helps a lot either way.
Cracking usually means the dough is too dry or the surface is drying while you work. Add water 1 teaspoon at a time when kneading until the dough is firm but pliable, and keep dough balls covered. Also, roll from the center outward and rotate often; aggressive rolling at the edges makes cracks.
Yes. Roasting on a tawa or directly over a flame gives classic flavor with no added oil. An air fryer is also great for consistent crunch. Fried papad is delicious, but it is not required for a crispy result.
Let it cool on a rack so steam does not soften it. If it softens later, re-crisp on a hot tawa for about 15 seconds per side. For topped versions like easy masala papad, serve immediately because the juicy topping will soften the papad over time.
Papad is a great crunchy side for rich mains, including meat-based curries. Try it with chicken thigh curry for a deeper, fuller sauce, or with a drier chicken breast tikka-style dish if you want contrast between lean protein and crisp papad. It also works beside goat or lamb dishes where you want something sharp and crunchy to cut through richness.