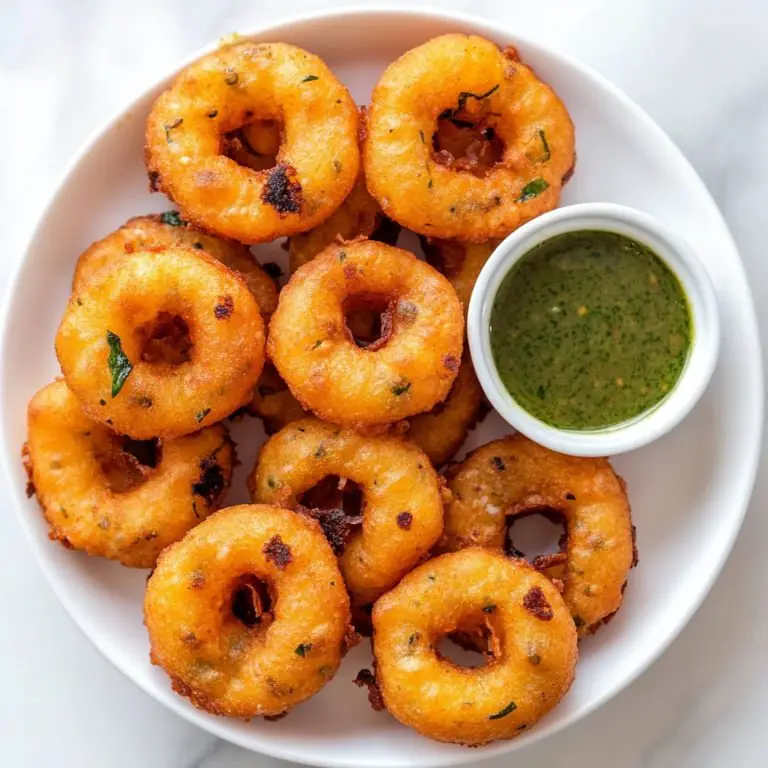
There’s something deeply comforting about biting into a hot medu vada – the crisp, golden-brown crust giving way to a soft, cloud-like center, perfectly spiced and fragrant with the aroma of curry leaves and black pepper. These iconic South Indian lentil fritters are best enjoyed with coconut chutney and a cup of steaming filter coffee, especially on a rainy morning. Unlike the denser parippu vada or the starchy crunch of sabudana vada recipes from Maharashtra, medu vada has an airy, donut-like texture that’s truly unique. Whether you’re new to South Indian cuisine or grew up dipping idli vada in sambhar, this recipe will bring back memories—or create new favorites.
Crispy Medu Vada with Fluffy Centers
Prep Time 6 hours hrs
Cook Time 30 minutes mins
Total Time 6 hours hrs 30 minutes mins
Course Appetizer, Breakfast, Snack
Cuisine Indian
Wet grinder or powerful blender To get the perfect fluffy batter, a wet grinder is traditional and ideal. A high-speed blender can be used but you might need to scrape often and use less water.
Large bowl For mixing the batter thoroughly with the spices.
Slotted spoon To handle the vadas while frying.
Deep frying pan or kadai Wide and deep enough to comfortably fry multiple vadas without crowding.
Parchment paper or banana leaf For shaping the vadas if you’re not comfortable forming them by hand.
Paper towels For draining excess oil.
Alternative If you’re avoiding deep frying, you can experiment with air frying (though you’ll sacrifice some crispiness).
- Urad dal whole or split, skinned – 1 cup (soaked for 4-5 hours)
- Ginger – 1 tablespoon finely chopped
- Green chilies – 2 finely chopped (adjust to taste)
- Black peppercorns – 1 teaspoon slightly crushed
- Curry leaves – 8-10 chopped
- Asafoetida hing – a pinch
- Salt – to taste
- Onion – 1 small finely chopped (optional, but adds flavor)
- Rice flour – 1 tablespoon optional, for extra crispiness
- Oil – for deep frying
Step 1: Soak and Prep the Dal
Start by washing the urad dal several times until the water runs clear. Soak it in enough water to cover by at least 2 inches. Let it sit for 4 to 6 hours. Longer soaking helps achieve a fluffier batter.
Step 2: Grind to a Fluffy Batter
Drain the soaked dal completely and transfer it to a wet grinder or high-speed blender. Grind it with minimal water—just enough to get it moving. The batter should be thick, light, and smooth. Add a tablespoon or two of water at a time if needed.
Step 3: Whip Air into the Batter
Transfer the batter to a mixing bowl and beat it vigorously with your hand or a spoon for about 5–7 minutes. This step is crucial—incorporating air makes the vadas fluffy. Drop a bit of batter in water: if it floats, it’s airy enough.
Step 4: Add the Flavor
Mix in chopped ginger, green chilies, black pepper, curry leaves, onion (if using), asafoetida, rice flour (optional), and salt. Mix gently to incorporate.
Step 5: Heat the Oil
Heat oil in a deep pan or kadai. The oil should be medium-hot, around 350°F (175°C). You can test it by dropping a tiny bit of batter in—it should sizzle and rise immediately.
Step 6: Shape the Vadas
Wet your palms with water. Take a small ball of batter, make a hole in the center with your thumb, and gently slide it into the hot oil. Alternatively, shape the vadas on parchment paper and slide them in using a spatula.
Step 7: Fry to Golden Perfection
Fry a few vadas at a time, flipping occasionally, until they are golden brown and crisp—this usually takes 5–6 minutes per batch. Drain on paper towels.
Step 8: Serve Hot
Serve the medu vadas hot with coconut chutney, sambar, or mint-cilantro chutney. They are best eaten fresh!
Pairing Suggestions – Chutneys, Drinks, and Meals
- Coconut Chutney: A classic pairing. Blend fresh coconut, green chilies, ginger, and tempered mustard seeds for the ultimate dip.
- Sambar: Dunk the hot vadas in spicy, tangy sambar for a complete South Indian meal.
- Curd + Tempered Mustard Seeds: A quick version of dahi vada recipe, South Indian style.
- Masala Chai or Filter Coffee: The earthy tones of the vada balance beautifully with the bitterness of coffee or the spice of chai.
- Vadapav Fusion: For a twist, stuff medu vadas into pav with green chutney and tamarind sauce to create a quirky nod to vada pao or vadapav recipe. It's a crunchy alternative to batata vada recipe, ideal for those looking to break the monotony.
If you’re into visual food storytelling, these vadas are excellent for vadapav photography or even juxtaposing with a kothimbir vadi recipe spread.
FAQs – Let’s Deep Fry the Doubts
1. Can I use split urad dal instead of whole?
Yes, split and skinned urad dal works just as well. Whole urad dal may yield slightly fluffier results, but the difference is minor.
2. Can I make medu vada without onions?
Absolutely! Onions add a sweet sharpness, but for a traditional taste (and if you're making this for a festival), skip them.
3. Why are my vadas hard or dense?
The batter might be too thick, or not whipped enough. Incorporating air by beating the batter well is essential for a fluffy interior.
4. Can I make the batter ahead of time?
You can make it a few hours ahead and store it in the fridge. Let it sit out for 15 minutes before frying. Avoid storing overnight, as the batter can ferment and turn sour.
5. Can I bake or air-fry medu vadas?
Technically yes, but don’t expect the same texture. Deep frying gives that classic crispy exterior. Baking or air-frying might make them more like dense fritters, not the airy centers we love.
